How to Install a Hydraulic Breaker on a Mini Excavator

Time:2026-09-08 Author:Madeline
0%

Installing a hydraulic breaker can transform a mini excavator into a precise demolition and trenching tool. However, performance depends on more than attaching the hammer to the arm. Oil flow, pressure, mounting dimensions, and operator technique must work together. This guide explains How to install a hydraulic breaker on a mini excavator with practical, workshop-focused advice.

Before installation, confirm the breaker’s weight suits the excavator’s lifting capacity. Check the manufacturer’s flow and pressure limits carefully. An incorrect setting may overheat the hydraulic system or damage internal seals. Inspect the mounting bracket, pins, bushings, hoses, and couplers for wear. Even a small crack deserves attention. Clean hydraulic connections before opening them. Dirt entering the system can cause expensive failures.

The installation process includes preparing the machine, fitting the breaker, connecting hydraulic lines, and testing operation at low engine speed. Keep the breaker supported on stable ground. Never rely on hydraulic pressure alone. A qualified technician should verify relief pressure and auxiliary circuit direction when required. In practice, the first test may reveal minor leaks or an incorrectly routed hose. That is normal, but it should never be ignored. Stop, depressurize the system, and investigate the cause. A careful inspection often matters more than speed. This article also highlights common mistakes, maintenance checks, and operating habits that help protect both the attachment and the mini excavator.
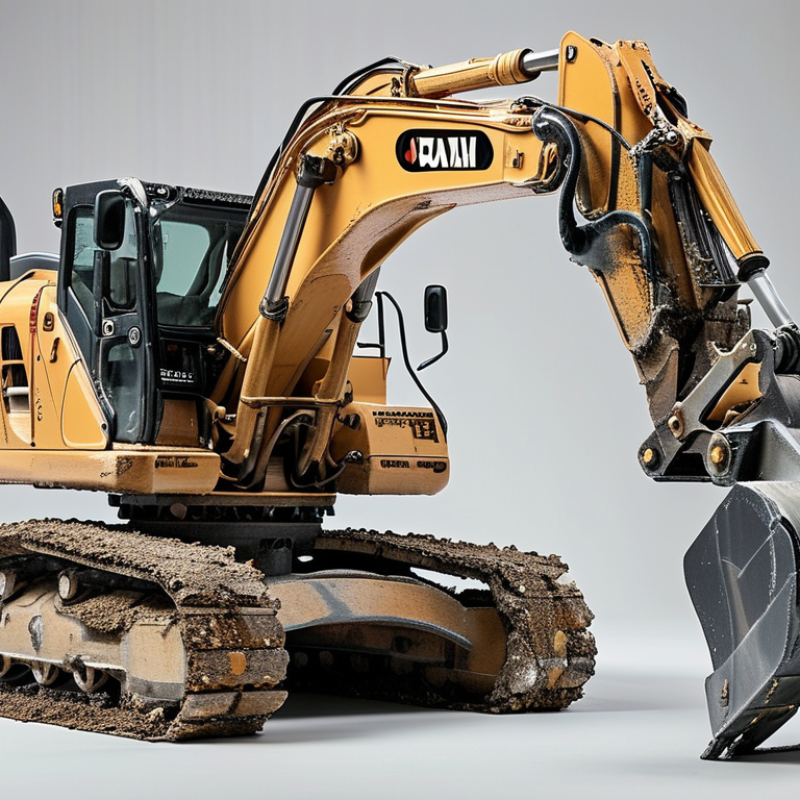
How to Install a Hydraulic Breaker on a Mini Excavator

Choose the Correct Hydraulic Breaker and Mini Excavator Setup

Choosing the correct hydraulic breaker starts with the mini excavator, not the attachment. Check operating weight, lift capacity, hydraulic flow, and working pressure in the excavator manual. The breaker should match the carrier’s auxiliary circuit. Too much flow can overheat oil or damage seals. Too little flow reduces impact energy. Keep it practical. A compact excavator often needs a lighter breaker for stability and control. The heaviest option is not automatically the best.

Match the breaker’s service weight to the machine’s lifting capacity. Measure the quick coupler or mounting bracket before delivery. Pin diameter, pin spacing, and hose positions must align. Confirm the breaker’s accumulator requirements and tool diameter. I have seen operators focus on hammer size while ignoring return-line restrictions. That mistake creates heat quickly. Use hoses rated for the circuit, and route them away from sharp steel. Leave enough slack for full boom movement. Small details matter.

Before installation, relieve hydraulic pressure and clean every connection. Secure the breaker with the correct pins, retainers, and locking device. Connect supply and return lines according to the excavator’s hydraulic layout. Some breakers need a dedicated case-drain line; verify this before operating. Set flow and pressure with calibrated gauges, not guesswork. Test at low engine speed first. Listen for abnormal knocking, leaks, or sluggish movement. Stop immediately if the breaker cycles without contact. Recheck mounting bolts after the first working period. My early setups sometimes needed a second hose adjustment, which taught me not to rush alignment. A careful fit beats force.

Prepare the Excavator and Breaker for Safe Installation

Before installing a hydraulic breaker, park the mini excavator on firm, level ground. Lower the attachment and shut down the engine. Remove the key.

In field work, I have learned that preparation prevents most installation mistakes. Read the excavator and breaker manuals together. Confirm the breaker weight, hydraulic flow, pressure range, mounting dimensions, and hose size. The machine must safely handle the attachment. Never guess these values. A wrong setting can cause overheating, weak performance, or component damage.

Wear eye protection, gloves, safety boots, and close-fitting work clothing. Relieve hydraulic pressure before disconnecting any line. Even a small trapped pressure pocket can move a hose violently. Inspect the breaker body, mounting bracket, retaining pins, bushings, tool, and hydraulic hoses. Look for cracks, bent parts, loose fittings, or damaged seals. Cap and plug every open connection immediately. Keep dirt away from the hydraulic circuit.

Clean the mounting area carefully. Position the breaker where it cannot roll or tip. Use approved lifting equipment when its weight exceeds safe manual handling limits. Check that the excavator quick coupler or mounting link is fully compatible. I once saw a rushed pin inspection create hours of rework. That mistake was avoidable. A second inspection feels slow, but it protects people and equipment. Keep bystanders outside the working area.

Connect the Breaker to the Excavator Hydraulic System

Connecting a hydraulic breaker begins with the excavator’s hydraulic manual, not the breaker itself.

Park on level ground, lower the attachment, stop the engine, and move the controls to release trapped pressure. The U.S. Bureau of Labor Statistics recorded 1,069 construction fatalities in 2022, so pressure isolation deserves more than a quick glance. Hydraulic fluid can penetrate skin at surprisingly low pressure, according to NIOSH safety guidance.

Identify the pressure, return, and pilot lines before attaching hoses. Some breakers also require a dedicated case-drain circuit. Never connect it by guessing. Check the excavator’s permitted flow and pressure against the breaker’s rated range. Excess flow creates heat; restricted return flow can damage internal seals. Clean every coupler, cap, and hose end. A small grain of grit can travel like sand through a bearing.

Connect the pressure line to the correct auxiliary port and the return line to a low-backpressure return circuit. Tighten fittings to the service manual’s torque values, then route hoses away from sharp edges and pinch points. Start the engine at low speed and test the circuit without striking the ground. Watch for leaks, abnormal vibration, and rising oil temperature. ISO 4413 emphasizes contamination control, pressure protection, and safe energy release in hydraulic systems. I still recheck hose direction after installation. It is an easy mistake. After several minutes, stop the machine and inspect every connection again; a dry fitting at startup may leak once the oil warms.

Secure the Attachment and Test Its Operation

How to Install a Hydraulic Breaker on a Mini Excavator

Secure the attachment before testing its operation. Park the mini excavator on firm, level ground. Lower the boom and release hydraulic pressure. Never trust the attachment’s weight alone. Insert the mounting pin fully, then install the retaining pin or locking device. Check that both pins sit flush. Inspect the coupler, bushings, hoses, and fittings for damage. Hydraulic hoses should not twist, rub, or bend sharply.

The U.S. Bureau of Labor Statistics reported that contact with objects and equipment caused about 14% of workplace deaths in 2023. That figure makes a secure connection more than a routine check. Stand outside the breaker’s swing area. Start the engine at low speed. Operate the control briefly, then stop and inspect every connection. Look for oil mist, leaks, loose hardware, unusual vibration, or irregular noise. A small leak can become a high-pressure injection hazard. Do not use your hand to find it.

Tips: Confirm the breaker’s weight matches the excavator’s rated capacity. Test the attachment against scrap material, not concrete beside people or structures. Keep bystanders behind a clear boundary. Recheck the pins after several minutes. I have found that rushed inspections often miss a half-seated locking pin. That mistake is easy to prevent, but not always easy to notice. Follow the attachment manual and applicable requirements, including ISO 20474 guidance for earth-moving equipment safety.

How to Install a Hydraulic Breaker on a Mini Excavator

Secure the Attachment and Test Its Operation

The chart shows representative hydraulic pressure readings during a breaker installation and operational test. Confirm the attachment pins, connect the hydraulic lines correctly, inspect for leaks, and compare the final pressure with the mini excavator’s service-manual limits before continuous operation.

Adjust Breaker Settings and Follow Safe Working Practices

Installing a hydraulic breaker on a mini excavator starts with a clean, stable work area. Park on firm ground, lower the attachment, stop the engine, and release trapped hydraulic pressure according to the manual. Confirm the breaker matches the excavator’s weight, auxiliary flow, and pressure requirements. Inspect hoses, couplers, pins, and seals before connection. A loose coupler can become a serious hazard. Connect the hydraulic lines correctly, and never guess port functions. If specifications remain unclear, ask a qualified technician to measure the system.

Tips: Wipe every coupling before connection. Keep protective caps clean. After mounting, run the engine slowly and check for leaks. Do not touch pressurized fittings. Set impact power and blow frequency for the material, not maximum output. Start with short bursts on concrete. Watch vibration, oil temperature, and unusual noise. If the breaker feels harsh, stop and reassess the settings. This pause can prevent expensive damage.

Safe operation depends on controlled positioning. Wear eye, hearing, hand, and foot protection. Keep bystanders outside the work zone. Avoid unstable edges and areas with hidden services. Hold the breaker perpendicular to the surface. Side loading can bend the tool or damage the lower bushing. Use short cycles and allow cooling when temperatures rise. Do not pry unless the manual permits it. Operators sometimes increase pressure when progress slows. That reaction is understandable, but it may hide a worn tool or incorrect settings. Record the final settings for the next inspection.

How to Install a Hydraulic Breaker on a Mini Excavator - Adjust Breaker Settings and Follow Safe Working Practices

Stage Task or Setting Typical Guidance Inspection or Adjustment Safe Working Practice
1. Compatibility Match the breaker to the mini excavator Confirm the breaker operating weight is suitable for the excavator’s approved attachment range. Check hydraulic flow, pressure, mounting dimensions, and auxiliary-circuit requirements. Use the excavator and breaker technical manuals. Do not rely only on machine lifting capacity or physical fit. Park on firm, level ground and keep unauthorized people away from the attachment area.
2. Preparation Relieve hydraulic pressure Lower the boom and attachment to the ground, stop the engine, move the hydraulic controls through their operating positions, and follow the machine’s pressure-release procedure. Verify that hoses are cool enough to handle and that no trapped pressure remains before loosening any connection. Never check for leaks with bare hands. Use cardboard or a suitable leak-detection method and wear eye and hand protection.
3. Mounting Install the breaker on the dipper arm Align the mounting holes, install the approved pins and retainers, and confirm that the breaker is fully seated in the coupler or linkage. Check pin retention, locking indicators, bushings, retaining clips, and any required locking wedges. Torque fasteners only to the specified values. Keep hands and feet out of pinch points. Use a lifting device when the breaker weight exceeds safe manual-handling limits.
4. Hydraulic Connections Connect supply, return, and case-drain lines Connect the pressure line to the breaker inlet and the return line to the correct low-restriction return circuit. Connect a case-drain line only when required by the breaker design. Keep couplers clean, inspect O-rings, route hoses away from sharp edges, and ensure adequate slack through the full boom movement. Cap disconnected hoses and ports immediately. Hydraulic fluid under pressure can penetrate skin and cause a medical emergency.
5. Initial Flow Set auxiliary hydraulic flow Begin at the low end of the breaker’s approved flow range. Many mini-excavator breakers operate within approximately 20–80 L/min, but the correct range depends on the equipment. Measure flow with a calibrated flow meter where possible. Excessive flow can cause overheating and damage; insufficient flow can reduce performance. Do not adjust flow or pressure while standing near moving components or unsupported parts of the attachment.
6. Pressure Control Set operating and relief pressure Use the breaker manufacturer’s specified operating-pressure range and the excavator’s approved auxiliary-circuit limit. Never increase pressure simply to obtain more impact force. Confirm pressure using a gauge at the correct test point. Investigate abnormal pressure spikes, slow operation, or excessive heat. Only trained personnel should change hydraulic settings. Stop work if hoses vibrate excessively or fittings show leakage.
7. Impact Mode Select operating mode and frequency Use the excavator’s approved auxiliary mode. Start with the breaker’s standard frequency setting and adjust only within the documented range for the material and tool. Use lower frequency or shorter cycles for hard, thick material when recommended. Avoid settings that create excessive vibration or heat. Keep the operator’s cab door and windows closed when dust or flying fragments are present.
8. Lubrication Lubricate the tool and bushings Apply the specified breaker grease before operation and at the service interval stated in the technical manual. Frequent use may require more frequent lubrication. Check for visible grease at the tool interface and inspect for dry, damaged, or excessively worn bushings. Shut down the machine and lower the breaker before lubricating. Never place any part of the body beneath an unsupported attachment.
9. Test Operation Run a controlled functional test Cycle the breaker briefly at low engine speed, then inspect operation before increasing to the normal working speed. Check impact sound, tool movement, hose temperature, leaks, abnormal vibration, and attachment stability. Maintain a clear exclusion zone. Stop immediately if the breaker fires unexpectedly or the tool does not remain aligned.
10. Working Technique Position the breaker correctly Hold the tool approximately perpendicular to the work surface. Apply steady feed force without forcing the boom or using the breaker as a pry bar. Move to a new location when the material does not fracture after a short controlled cycle. Avoid prolonged blank firing. Keep people, vehicles, utilities, and fragile structures outside the potential flying-debris zone.
11. Monitoring Control heat and contamination Monitor hydraulic temperature, fluid cleanliness, and machine warning indicators. Excessive heat can result from high flow, restricted return flow, or continuous operation. Stop and inspect if the hydraulic oil becomes unusually hot, the breaker slows, or the attachment develops abnormal noise or vibration. Use hearing protection, safety footwear, eye protection, gloves, and a hard hat where required by the worksite risk assessment.
12. Shutdown Park and disconnect safely Stop the breaker, place the attachment on stable ground, shut down the engine, release hydraulic pressure, and disconnect hoses only after pressure has been relieved. Inspect pins, retainers, tool point, hoses, couplers, and mounting hardware before storage or transport. Fit protective caps and store the breaker securely so it cannot roll, tip, or move unexpectedly.
Important: Hydraulic flow, pressure, lubrication intervals, mounting hardware, and operating settings vary by equipment. Always verify the final settings against the current excavator and breaker manuals, applicable regulations, and the site-specific risk assessment.

FAQS

: What should I do before installing a hydraulic breaker?

: Park the mini excavator on firm, level ground. Lower the attachment and stop the engine. Remove the key. Relieve hydraulic pressure according to the manual. Never guess.

How can I confirm compatibility?

Check the breaker weight, hydraulic flow, pressure range, mounting size, and hose size. The excavator must safely carry the attachment. Ask a qualified technician when specifications remain unclear.

What safety equipment should I wear?

Wear eye protection, gloves, safety boots, hearing protection, and close-fitting clothing. Keep bystanders outside the work zone. Use approved lifting equipment for heavy attachments.

How do I secure the breaker correctly?

Insert the mounting pin fully. Install the retaining pin or locking device. Both pins should sit flush. Check the coupler, bushings, hoses, and fittings. Never trust weight alone.

How should I connect the hydraulic hoses?

Clean every coupling before connection. Keep protective caps clean. Connect each hose to the correct port. Hoses must not twist, rub, or bend sharply. A rushed connection can cause trouble.

How do I test the attachment after installation?

Start the engine at low speed. Operate the breaker briefly, then stop. Inspect for leaks, oil mist, loose hardware, vibration, and unusual noise. Never use your hand to find a leak.

What settings provide safer breaker operation?

Match impact power and blow frequency to the material. Start with short bursts on scrap material. Watch oil temperature and vibration. Maximum output is not always better. Stop immediately.

What operating mistakes should I avoid?

Hold the breaker perpendicular to the surface. Avoid side loading, unstable edges, and hidden underground services. Do not pry unless the manual permits it. Use short cycles and allow cooling.

How often should I recheck the installation?

Recheck the pins after several minutes of operation. Inspect hoses, fittings, seals, and locking devices again. A half-seated pin can look secure. The second inspection may feel slow, but it can prevent injury and equipment damage.

Conclusion

How to install a hydraulic breaker on a mini excavator begins with selecting a breaker that matches the excavator’s weight, hydraulic flow, pressure, and mounting configuration. Before installation, park the excavator on firm, level ground, shut down the engine, release hydraulic pressure, and inspect the attachment, pins, hoses, and fittings for damage or contamination. Proper preparation helps prevent leaks, misalignment, and unsafe movement during connection.

Next, connect the breaker’s hydraulic hoses to the correct auxiliary ports, ensuring that the supply and return lines are properly identified and securely fastened. Install and lock all attachment pins, then start the excavator and test the breaker at low engine speed while checking for leaks, unusual vibration, or irregular operation. Adjust the flow, pressure, and impact settings according to the equipment requirements. During work, wear suitable protective equipment, keep bystanders away, avoid striking unstable materials, and perform regular inspections to maintain safe and efficient operation.

Madeline

Madeline

Madeline is a dedicated marketing professional with a wealth of expertise in our company's core offerings. With a keen understanding of the industry, she brings a unique perspective to her role, consistently delivering high-quality content that highlights the superior aspects of our products. As......